Conditioning a Wine Barrel
updated 10/22/2023
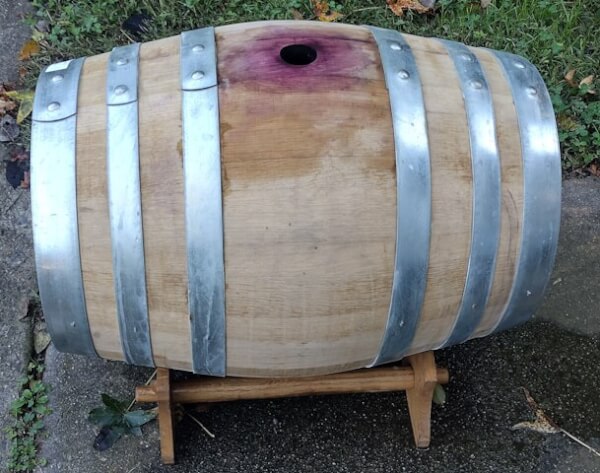
This morning I picked up a new barrel — well, new to me. A member of our local grape purchasing group needed to eliminate a barrel, so he gave away a 2 year old Balzars 55 liter Hungarian oak barrel. I was the first to respond, so I’m the lucky winner!!!
When picking it up, I discovered the barrel has been empty for 5 months, so it needs conditioning before usage. Possible problems include:
- mold growing inside
- barrel dried out and leaks
If there’s mold, I’ll probably junk the barrel. Or take a stab at doing a complete reconditioning, which involves dissembling the barrel, sanding down all interior wood, and re-assembling it. Although this sounds risky, if the barrel has mold, I can’t make it worse.
I will be working methodically through the conditioning process.
21 October 2023
The barrel looks clean and the seams appear tight, as in there are no visible separations between the staves. Other than staining around the bung hole, it looks really new.

This doesn’t mean the barrel can’t have developed small leaks, just that there is nothing obvious.
Before I get into the cleaning process, I’ll define the parts of the barrel.
- Stave – strips of wood that form the “sides” of the barrel.
- Hoop – metal bands that hold the staves in place. For wine barrels, there are typically 6.
- Head – round discs of wood what form both ends.
Most people think of the barrel when it’s standing on one end. As a winemaker, my POV is different — the barrel is always laying on one side with the bung hole facing up. From my POV, the “bottom” of the barrel is the part that is opposite of the bung hole.
First Step
First, I rinsed the barrel out, spraying it with a hose, probably a gallon of water. I swirled it about, then dumped it. The water was perfectly clear, no discoloration and especially no chunks of anything.
Next comes power washing. I use a 25 degree dispersion tip for most things, and this tip allows me to get the bottom, which is where sediment collects during aging. Any sediment can be compacted and may take effort to break loose, and a pressure washer makes this a lot easier.
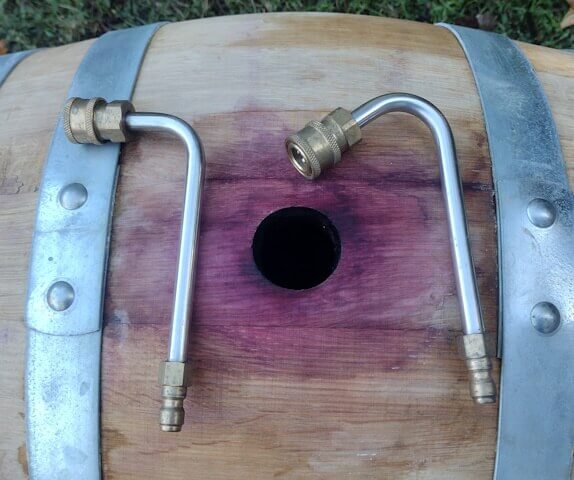
However, I can only reach a small area of the interior of the barrel with a standard power washer wand, which is straight. Fortunately, a while back I purchased a 10′ extension wand for the power washer, and it included two angled extensions for the wand, a 90 degree bend and a 120 degree bend.

I put the 25 degree dispersion tip on the 90 degree extension, and this enables me to clean the sides of the barrel (on either side of the bung hole) and both heads.
Then I put a 40 degree dispersion tip on the 120 degree extension, which with a bit of maneuvering, enables me to power wash the remainder with the exception of a small area around the inside of the bung hole.
Next I emptied the barrel (water still clear, no chunks) and filled it with fresh water.
New barrels typically leak, so the practice is to fill with water and keep them filled, until the wood swells and the barrel becomes tight. Since this barrel has been empty for five months, I have to treat it as if it’s going to leak. Even if it doesn’t leak, the wood is at least somewhat dry, so it still needs to soak.
Tonight before dark I will examine the barrel for leaks, and ensure it’s full. If in the morning it’s leak-free, I’ll go on to cleaning with Barrel Oxyfresh, otherwise I’ll keep soaking it.
22 October 2023

I checked the barrel at 4 PM yesterday, and the water level was down a bit. I added roughly half a cup of water.
Today I checked the barrel at 11 AM. The outside of the barrel is bone dry (Yayyy! No leaks!) and the water level was done about 2 cups. The amount is a guess on my part, as I didn’t both measuring.
The loss of water level is perfectly normal, as the dry wood is absorbing water. A new barrel needs to be soaked for at least a few days so the wood absorbs water, else it will be absorbing wine. Besides, if the barrel is leaking, it’s best that it leaks water.
I emptied the barrel, watching the water as it poured out. The water was clear, no discoloration and no chunks of anything, both excellent signs.
Next I added 1 lb Barrel Oxyfresh and filled the barrel with water.
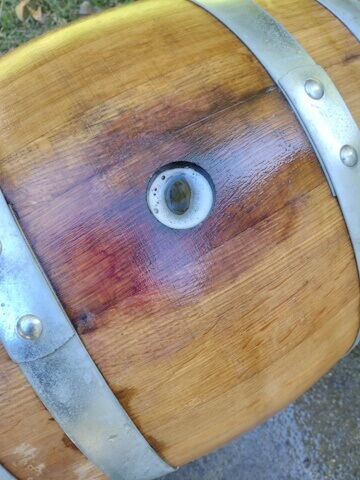
As the photo shows, the solution is foaming a bit.
I overflowed the barrel a bit, as the solution will remove the stain around the bung hole. The first year I used Barrel Oxyfresh I was surprised by this, as there was no soaking, just a bit of overflow. A few hours later the staining was mostly removed.
