
2021 FWK Barbera in Detail
Last updated 03/25/2024
I’ve decided to continue this blog, post-bottling, adding periodic tasting notes. See the menu below.
This blog is a step-by-step description of making a Finer Wine Kits (FWK) according to their directions. This is a how-to combined with a critique of both the kit and the instructions. I am also maintaining my normal wine log in a separate post.
Finer Wine Kits, in conjunction with Label Peelers, produced top notch videos that walk the viewing through the process of making one of the kits. I strongly recommend the videos for anyone wanting to make wine, as they are full of useful information, recorded by folks that actually know how to make wine.
Important Note: FWK are not pasteurized, so they are not shelf stable! They must be kept chilled or frozen prior to use, or it is entirely possible a spontaneous fermentation can occur within the juice/concentrate bag.
Other commercial wine ingredient kits contain pasteurized juice/concentrate, and can remain on the shelf for years. Unfortunately, kits can have an off-flavor commonly called “kit taste”, and there is belief that the pasteurization process is responsible for this.
This sounds reasonable to me, but I have not seen conclusive evidence. FWK supposedly do not have kit wine taste. We are going to find out!
Winemaking Activities
| 08/11/2021 | 08/17/2021 |
| 08/12/2021 | 08/30/2021 |
| 08/13/2021 | 09/14/2021 |
| 08/14/2021 | 01/17/2022 |
| 08/16/2021 |
Tasting Notes
Notes were recorded on:
01/21/2022
03/04/2022
03/24/2022
08/14/2023
03/25/2024
08/11/2021
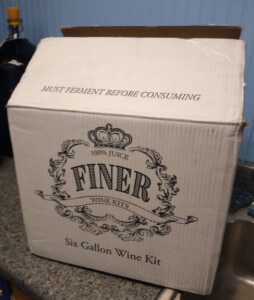
The box arrived today, in good condition, meaning it didn’t suffer any significant shipping damage. The corners of most boxes are often dented a bit, but this one is fine.
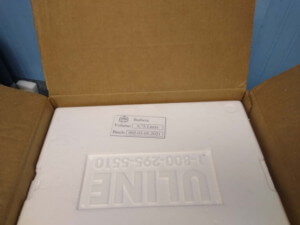
Upon opening I found a packing sheet, a manual, an addendum to the manual, and a Styrofoam container.
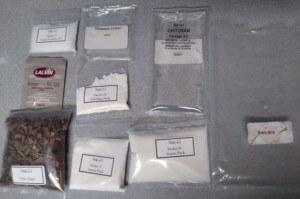
Taking the lid off the Styrofoam container revealed a bag of juice/concentrate and a packet of the additives and yeast. [For the remainder of this point, I’m going to the the term “juice” to indicate the juice + concentrate in the kit. It makes for easier reading.]
The first thing I did was check the temperature of the juice, as this is summer in NC and the FedEx truck is not air conditioned, nor is the warehouse. The kit is shipped cold and was still perceptively cool to the touch, well below room temperature (74 F in the main part of my house).
The book says the juice is safe at room temperature for a few days, but to start the winemaking process immediately if the bag is puffy, as that indicates the juice is fermenting. I found no evidence of fermentation.
I did note the Styrofoam container was cracked in several places, obviously due to rough handling. However, IMO it did its job and kept the juice cool enough for shipping purposes.
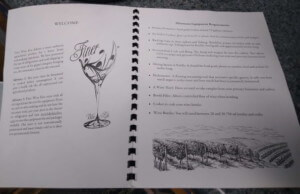
The manual is well done — it’s by far the best set of kit instructions I’ve read, and I’ve made almost 50 kits.
The text is large, which is a very nice change from the 3 point font some kit instructions use. It’s irritating to have to take a picture of the instructions so I can magnify the picture so I can read it. In that respect, the FWK manual is exceptional.
Looking at the addendum sheet, my guess is FWK printed a bunch of the manuals, and include an addendum as they refine the instructions. Once the first printing runs out, I expect they’ll use a revised version.
Page 2 lists the equipment required with brief descriptions, page 3 lists the kit components with descriptions, and page 4 through 6 provide information regarding the workspace, sanitation, and preparation. This is well geared for a beginner with no background in winemaking.
The additives for the wine are well labeled, including the name of what is in the package AND the step number in which it is used. Anyone following the instructions will get it right.
Before You Start
Note: Read the instructions!
Before starting anything, read the instruction manual from cover to cover. This includes an addendum sheet, if there is one.
Then read everything again. Ensure that you understand what you are reading — if in doubt, read it again and/or search the internet for extra help.
Step 1 – Your Work Space, Sanitation Recommendations, & Prepare Your Tools
This section covers the basics in good detail. The TLDR version including some of my comments:
- Make sure all equipment — EVERYTHING that will be in contact with the wine — is physically clean. This includes the workspace, including counters and other surfaces. If nothing else, sweep the floor to avoid kicking up dust and dirt.
- Make a sanitizing solution, called “K-meta water”, with 3 Tbsp Potassium Metabisulfite (K-meta) and 1 Tbsp Acid Blend or Tartaric Acid in 1 gallon of water. This solution is re-usable as long as it’s clear and stinks.
- Run a fan whenever using K-meta in any form, and if possible, ensure the area is ventilated, e.g., open the windows. The fumes will make you choke – DO NOT breathe the fumes more than absolutely necessary.
Step 2 – Prepare the Must
This section walks through the preparing the must (juice to be fermented) in clear, easy-to-read steps.
Note: The instructions call for distilled water; however, I used PurAqua purified water that I purchased at Aldi’s. I’m confident this is fine. Tap water is questionable, especially in areas with heavy chlorine or other additions. I’m on a well, and my water has a low pH (acidic) so using bottled water may be better.
While I intended to follow the instructions as written, I immediately went out of order — I performed Section 2.5 (prepare yeast starter) first. This doesn’t really matter as the start won’t be added until tomorrow, and I chose to do it first when I was organizing the additives, to ensure that I used them correctly. There are 3 nutrient additive packets and I didn’t want to make a mistake.
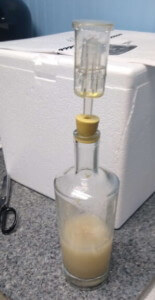
In short, put the yeast starter packet and the yeast in a wine bottle, add 1 cup water, and shake gently to stir. The instructions say to loosely cover the bottle with a screwcap (if the bottle is a screwcap bottle) or a paper towel secured with a rubber band. I had drilled stoppers and airlocks handy, so I used that instead. The purpose is to keep stuff out while letting any gases produced by the yeast to escape and not build up pressure.
Note: I’m impressed that the yeast is Lalvin Bourgovin RC 212, which is specifically for red wines, instead of Lalvin EC-1118 which is usually included in kits. EC-1118 is a great yeast — it’s a workhorse that I’m fond of saying will ferment a rock if given the chance. But it’s a generic yeast — for reds, a red-specific yeast is better, although any wine yeast will do the job.
Kit vendors typically include EC-1118 for that very reason — it’s the best yeast to ensure a beginner has a successful ferment.
Back to Step 2.1.
The juice bag had a label on the cover that indicates it contains Barbera juice, which is what I ordered. I unscrewed the cap, pulled the seal tab, and gently poured the juice into a primary fermenter.
Once empty, the bag still contained a lot of valuable residue which must be saved. The instructions call for adding 1/2 gallon of water to the bag to rinse out the very valuable residue, then add that water to the fermenter.

I did it a bit different, adding a couple of cups of water the bag, screwing the cap back on, and shaking/manipulating it to dissolve all the residue. As the photo shows, the water became very dark although a lot less viscous than the very rich juice. But it’s valuable material and should not be wasted! This liquid went into the fermenter with the juice.
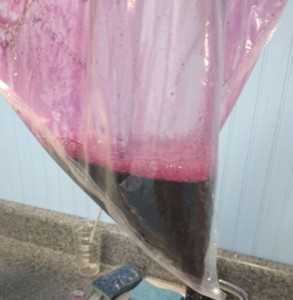
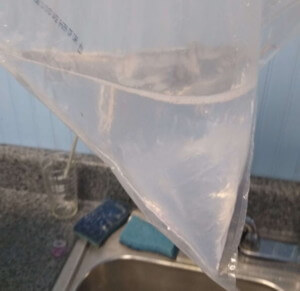
I repeated the process twice more, and in the third rinse the water was clear.

All the water used to rise the bag goes into the fermenter!
My primary is marked on the outside for 5 US gallons (19 liters) and a hard rim on the inside marks the 6 US gallon (23 liter) point — I continued to add more water until the level was 1/8″ below that rim.
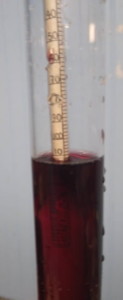
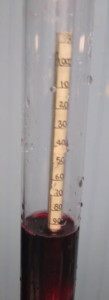
Next I checked the specific gravity (SG), which according to the addendum should be between 1.080 and 1.100.
This check came out WAY too high, roughly 1.115!!!
I intentionally did this to illustrate a point: STIR THE MUST!
Simply pouring everything into the fermenter does not mix it uniformly. As this test shows, the must can have varying densities.
I use a drill-mounted stirring rod and stirred the must for 2 minutes, changing directions every 30 seconds. The point is to mix the must, NOT whip it to a frenzy. Get it swirling in one direction, then adjust the drill and make the must swirl in the opposite direction. Repeat.
When I check the SG again, I got an expected value, 1.094.
Why do I care about the SG?
- Based upon the initial SG, I can determine the expected Alcohol By Volume (ABV). This matters since if the ABV is low (below 10%), the wine will have a shorter shelf life. If it’s too high, the ABV can be unpleasant, or the sugar can exceed the yeast’s alcohol tolerance and produce a sweet wine rather than dry.
- Adding nutrient during fermentation can eliminate the production of hydrogen sulfide (H2S), a noxious by-product that smells like rotten eggs and makes the wine taste terrible. A rule of thumb is to add more nutrient about 1/3 of the way through the ferment. Without knowing the initial SG, it’s not possible to know when the 1/3 point is reached.
- Without knowing the SG, it’s not possible to guarantee fermentation is complete. Fermentation can stop for many reasons, but if there is sugar remaining in the wine, the fermentation can restart in the bottle. The SG will indicate if there is sugar remaining or not.
I checked the must temperature at this point, reading 66.8 F. This is the result of 1.6 gallons of cold juice mixed with 4.4 gallons of room temperature water. This indicates the juice arrived cold enough, and that I need to let it set overnight to warm up a bit before inoculating — this is what the direction say, anyway.
Step 2.2 (preparing skins) is skipped, as I didn’t purchase skin packs for this wine.
Red grape juice will produce a lighter bodied table wine. To get more depth and complexity, the wine must be fermented with the skin and pulp. FWK sells “skin packs”, dried grape skin, which can be added to the ferment. I did not purchase skin packs for this wine as I want a lighter, quicker drinking wine, e.g., one that requires less aging before it’s good to drink.
Steps 2.3 and 2.4 (add the oak chips and nutrient pack A). Fermentation oak helps a bit with flavoring and more with color stabilization, e.g., the wine has a stronger color that doesn’t fade. The oak is removed at the first racking.
The nutrient pack includes yeast nutrient and an acid blend that is designed specifically for this Barbera kit to adjust the pH to an optimal level.
Simply stir the additives in.
I covered the primary with an old towel to keep stuff out. During fermentation yeast uses oxygen to reproduce, so it’s better to ferment in an open container.
One Last Tip
I was taught to clean the primary after each stirring. In the following picture, residue is visible on the inside of the fermenter.
I wet a clean paper towel liberally with K-meta water and wipe any residue from the inside of the fermenter down to the level of the must. This removes potential places for bacteria and mold to grow. I suspect that as the bit of K-meta residue evaporates, it helps protect the must from infection.
08/12/2021
Step 3 – Fermentation
Step 3.1 is adding the yeast starter.
First thing I did was confirm the SG — I got a different value, 1.091.
Ok … not totally surprising, as the mixing of the must continued on long after I finished stirring. Honestly, the difference from last night (1.094) is not significant.
So I tested 2 other locations in the must and got the 1.091 again, so I’m satisfied.
The instructions say to pour the yeast starter down the inside of the fermenter, so the yeast doesn’t spread out much. Supposedly the yeast “prospers better in numbers”, which makes sense. The yeast colony supports its members, so don’t stir.
I poured very gently.
Tomorrow if I have evidence of fermentation — foam, yeasty aroma — I’ll start stirring twice daily.
08/13/2021
We have ignition!!!
I sanitized a stainless steel stirring paddle, which is kept clean, and pushed down all floating oak, and pressed down on the foam to submerge and/or break it up. The idea is to submerge everything that floats on top. Then I stirred the wine from the bottom, not vigorously, but to mix into suspension any solids that may have dropped and to ensure the wine is mixed.
Why submerge the cap? To avoid contamination. If the cap dries out, mold & mildew can grow, so by keeping it wet we avoid that. Also, for wines make from fruit solids, the fermentation process extracts color, body, and flavor from the skin and pulp, and this works best if the solids are touching the wine that is forming.
Why stir the sediment? Fruit solids can start to rot relatively quickly when forming a solid layer. Mixing into suspension supposedly delays this.
Why stir the must at all? As my SG check on day 1 demonstrated, the must is not necessarily homogenous. Mixing helps ensure that all the yeast has access to all the sugar, and that an SG check can be relied upon as accurate.
Fermentation is off to a great start. I checked the must at 7AM, so the yeast got into high gear sometime after 7PM last night. I’ve often had visible fermentation within 12 hours of inoculation, and using a yeast starter with good nutrient gets things rocking much quicker.
However … depending on a lot of factors, fermentation can take up to 72 hours to be visible. These factors include:
- Temperature – Cold take longer. I’ve had warm ferments (80+ F) complete in 4 days, and cold ferments (around 60 F) take nearly 4 weeks. In general, 72 to 76 F is a good starting temperature.
- Temperature Changes – rapid temperature changes can stunt the yeast. For instance, if warm water is used to start the kit (78 F) and the surrounding temperature is colder (68 F), so that the must drops in temperature over a matter of hours, the yeast may not grow well, or may grow slowly.
- Sugar – very high sugar levels may produce an environment too rich for the yeast, so the yeast won’t grow.
- Amount of yeast in the must – a 5 gm packet of yeast is good for up to 6 gallons of must. If a 5 gm packet is used in a larger volume, it takes the yeast longer to multiply and spread throughout the must.
- Nutrient – yeast, like all living organisms, needs nutrition to prosper. If the must is deficient in yeast nutrients, the yeast will not multiply.
There are other factors, but the above are the common ones that can delay fermentation.
I will be stirring the must twice daily during fermentation. The addendum to the instructions say to add the booster packet of yeast nutrient 48 hours after inoculation, which is tomorrow morning. I’ll check the SG and determine if I want to do that.
08/14/2021

I didn’t stir the must last night — I got wrapped up in other things and forgot. So I made sure I stirred this morning. It was a surprise.
The ferment had obviously gotten vigorous — the residue on the inside of the fermenter all the way to the rim is evidence. The wine is foaming and the oak chips are in a narrow band on one side. No, this means nothing significant, just noting it.
I sanitized a stirring paddle and hydrometer, stirred the wine, and dropped the hydrometer in. I am not going to get a clear reading from this position, but that’s not my intention — I need to know if the SG has dropped to 1.060 or not, as that’s when I’ll add the last packet of yeast nutrient. The instruction say I can add the packet 2 days after inoculating, so if the SG is anything close to 1.060, I’ll do it.
1.035
WOW! This is a very fast ferment! Given the initial SG, I expected around 1.070. Seriously wow!
I sniffed — ok, no hint of rotten eggs, so no hydrogen sulfide (H2S). I’ll be sniffing for that each time I stir, as I had my first personal encounter with H2S last fall and if it occurs, the faster I react, the better!
Note: H2S can be produced if the yeast is stressed, which can include if the yeast has insufficient nutrients. This is one reason why the kit adds nutrient 1/3 of the way through fermentation.
Next I added the packet and stirred to mix, then used wet a paper towel with K-meta water and wiped the inside of the fermenter.
I got an idea, ran upstairs and got my digital kitchen thermometer. The probe is kept clean, so I sanitized it with K-meta water. It reacts quickly, so within 30 seconds I determined the air temperature is 73.8 F. I checked the must — 84.4 F!
Fermentation produces heat, and given this is summer in NC, even my cellar is warm-ish. This explains part of the fast ferment, probably in conjunction with a large colony from the starter.
At this point I’ll check SG each time I stir. I normally rack juices between 1.010 and 1.000, but might let this one go to “done”, as I want the maximum exposure to the fermentation oak.
08/16/2021
I intended to rack last night, as I was sure the fermentation would be complete, or very nearly so. However, we had the power flickering during the evening and it eventually was out for 20 minutes, so I didn’t want to get into racking and lose power. We are on a well, and with the power out the well pump stops, and when the pressure tank is empty we are out of water until the power comes back on.
This morning the SG is 0.998, which means the wine might be done, or more likely it’s got a bit more to go. Either way, it’s time to rack.
All equipment is cleaned after each use, so I visually inspect then sanitize. For racking, I rack K-meta water from the jug into the 5 US gallon carboy and 4 liter jug I’ll use for secondary storage, splashing the insides so all surfaces are wet. This ensures the inside of the racking cane and tubing are sanitized.
K-meta doesn’t sanitize instantly, it takes 5 to 10 minutes. So I sanitize everything and continue with other preparations, so by the time racking begins, the equipment has sat for at least 5 minutes, more likely 10 to 15 minutes.
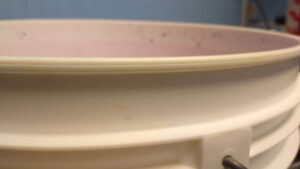
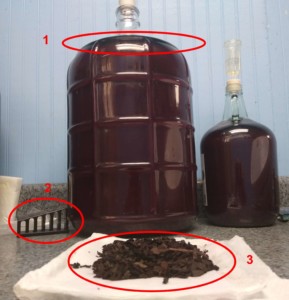
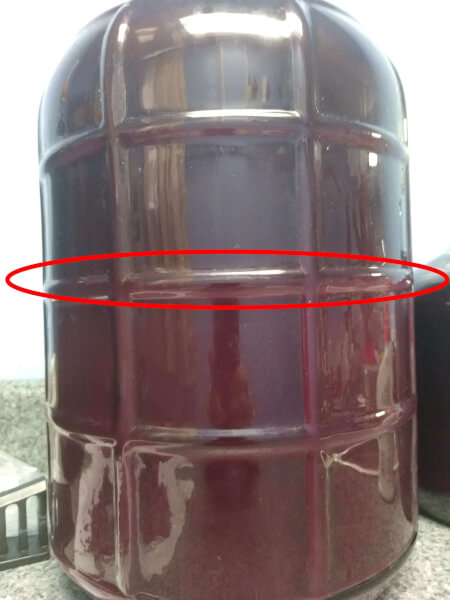
The picture to the left shows 3 things:
- #1 – There is nearly 2 inches of clear wine at the top of the carboy, as the wine is already clearing 2 hours after racking. The wine settles from the top down, so settling can be watched.
- #2 – The object is a handy tool, a racking wedge. I put it under the edge of a primary fermenter or carboy, and it tilts the container. When I rack, I hold the end of the cane off the bottom so it’s clear of sediment. As the wine level goes down, I lower the cane, and by tilting the container, I get more wine racked with very little loss.
- #3 – I save the expended oak chips and am drying them. Next time I smoke meat on the grill, I’ll burn the chips for flavoring.
Note: On racking #1, I DO NOT worry about sucking up sediment. I avoid it was much as feasible, but don’t worry about getting some as the wine will drop a lot more sediment in upcoming weeks.
My intention is to lose as a little wine as possible. I’ve seen people toss several cups of wine out at each racking of a 5 gallon carboy, because they were so concerned about sediment. Then they complain because they need so much topup. There will be at least 2 more rackings, after the wine has time to age, so the sediment will be eliminated.
When done racking I add water to the fermenter to dissolve the thick sludge, and pour it into a large funnel with a strainer. I’m on a septic system and don’t put anything down the drain if I can help it.
The last steps are to put airlocks on both containers and to clean all equipment.
Note: The wine tastes good, for a totally green wine that has a lot of carbonation. I sniff and taste the wine at every racking, and have been doing this long enough that I understand the smell & taste at all stages of winemaking.
08/17/2021
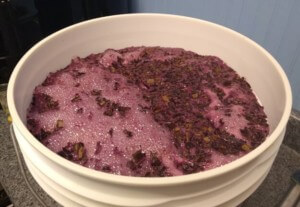
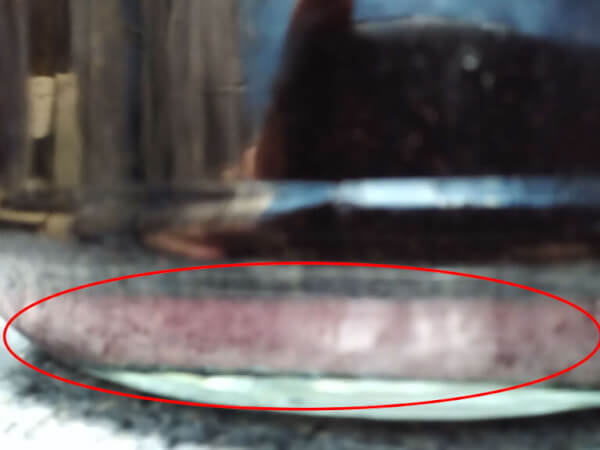
There’s no winemaking actions today — however, I want to present a picture of how the wine clears. It may not be as visible in the picture, but the wine above the halfway mark is visibly clearer than that below.
08/30/2021
I let the wine rest for 2 weeks and racked today. A fair amount of sediment settled and then compacted. When I racked, the sediment was well congealed — I didn’t suck up much.
Big Note: At this racking I don’t worry about sediment. I’m going to add a fining agent so the amount of sediment that gets transferred doesn’t really matter.
After racking I added a heaping 1/4 tsp K-meta and stirred for 30 seconds, then reversed direction. There wasn’t as much foaming as usual.
But this makes sense — I normally rack kits between 1.010 and 1.000, but this one was 0.998, so there was less remaining activity. Also, I usually rack in 7 to 10 days, and this time it was 14, so the wine has had more time to naturally degas.
I threw out Packet D, which is K-meta and sorbate. There is absolutely no reason to add sorbate to a dry wine. Sorbate, in conjunction with K-meta, prevents a renewed fermentation. Kit vendors include it as newbies make mistakes and bottle wine that is not fully fermented. The sorbate prevents a renewed fermentation. If following the instructions and the final SG is 0.998 or lower, the fermentation is done and the wine will not ferment in the bottle.
The FWK directions differ from other kits in 2 ways:
- Instead of stirring for 30 seconds, then reversing directions 5 times (total of 3 minutes of stirring), the instructions say to stir for 30 seconds. Period.
- Instead of adding kieselsol and waiting before adding chitosan, the instructions say to simply add both.
I stirred for 20 seconds, reversed direction, and stirred for 20 more. The wine was foaming good, so it was clearly degassing.
Next I added the kieselsol and stirred for 20 seconds, then added the chitosan, reversed the drill and stirred for 20 seconds more.
I racked the wine first into a 4 liter jug, filling it to the bottom of the neck. Then I racked the remainder into a 5 gallon (19 liter) carboy.
In the past I would have filled the carboy then divided the remainder among smaller containers to eliminate head space. Tonight I said “no”. I filled the jug and then filled the carboy. Then I topped the carboy with almost a full bottle of commercial Montepulciano.
Why? I didn’t feel like messing with jugs. It was a lot easier to simply top the carboy with a compatible wine and go about my business. I have another bottle of this wine and when I rack off the sediment, I’ll repeat the topping.
I’m going to drink the Montepulciano, one way or another. Either as a varietal on its own, or as part of the Barbera. This is simply easier for me, and I should have started doing it years ago.
Regarding the fining agents, the wine looked clear when I racked it. However, less than 20 minutes after adding the fining agents, I had a significant layer of sediment in the carboy. Fining agents work.
09/14/2021
Today was racking day — there was not that much sediment, and it was compacted. Letting the wine rest a bit longer before the last racking took out more sediment.
I added a rounded 1/4 tsp of K-meta. Since my batch is 6 gallons / 23 liters, I added a bit more than the 1/4 tsp per 5 gallons.
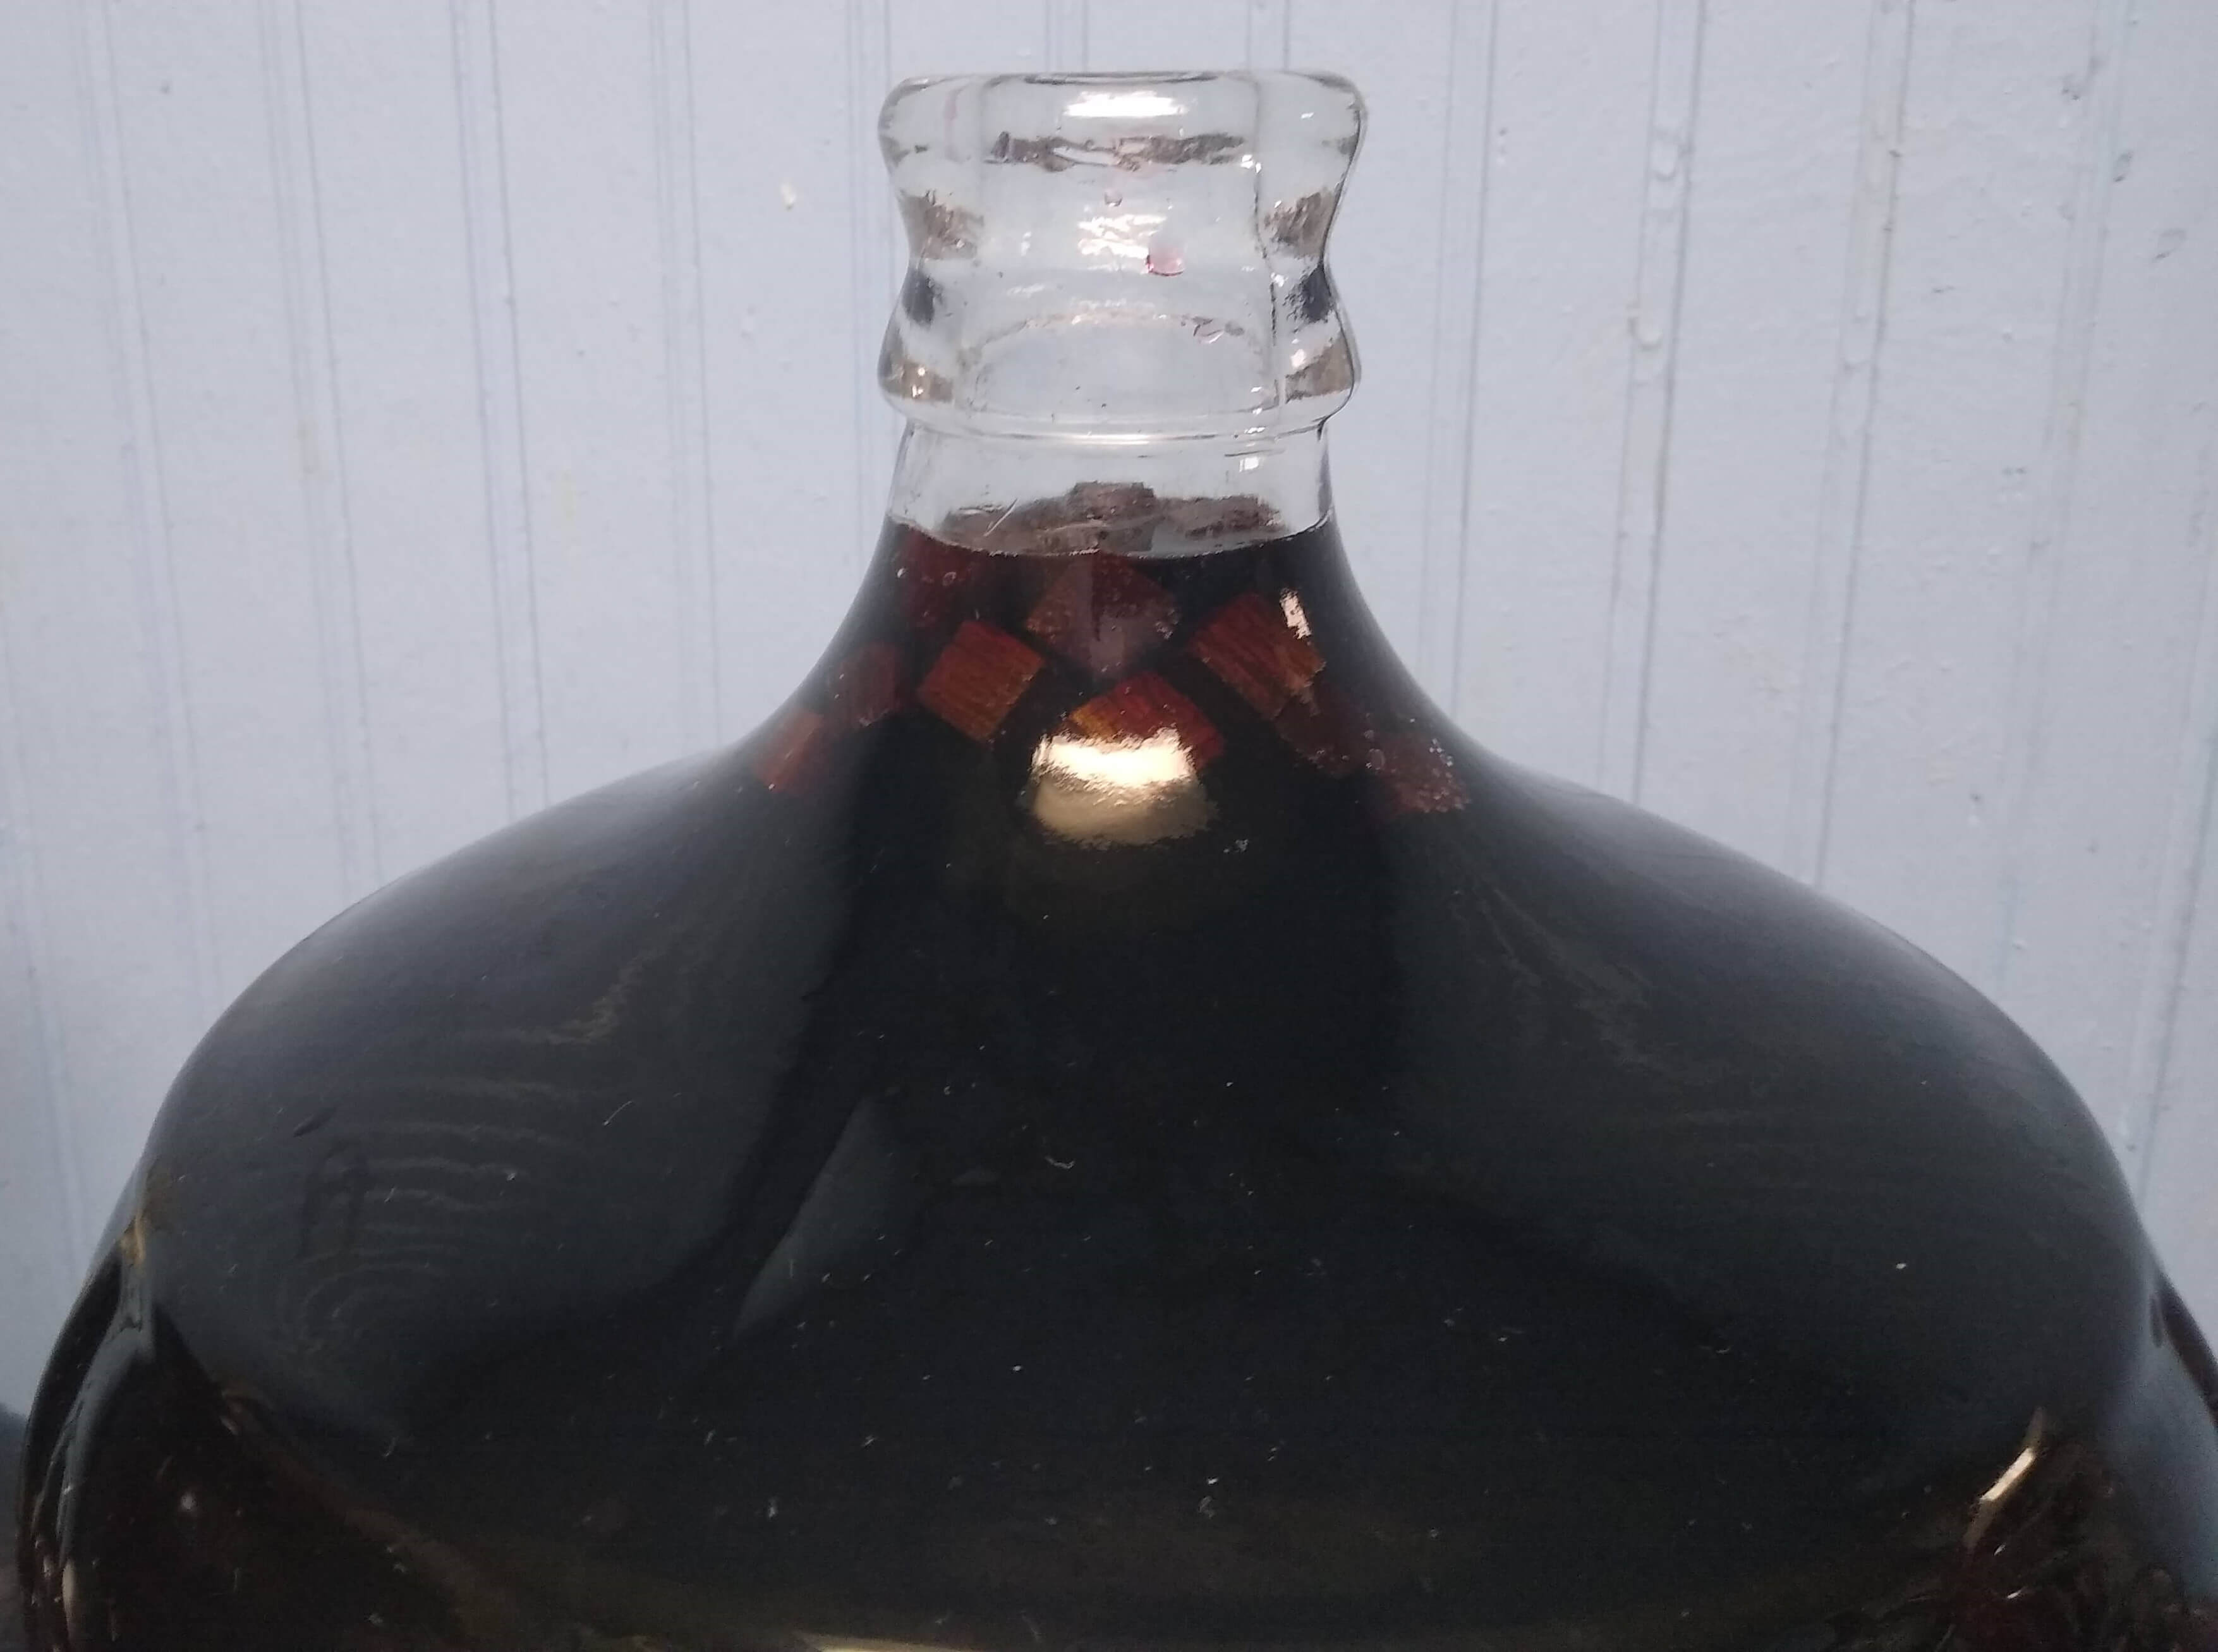
When racking back, I filled the 4 liter jug first. Then I added 1 oz medium toast Hungarian oak cubes to the carboy before starting the siphon. This wine could easily 2 oz of cubes, but my intention is a lighter, quicker-to-drink wine, so 1 oz will give it a bit of oak character without affecting the aging process too much. I’ll probably bulk age the wine 6 months, adding K-meta at the 3 month mark, and then bottle.
The carboy was not full, as I lost volume to the sediment. As with last time, I opened a bottle of Montepulciano D’Abruzzo and topped the carboy. Before topping the carboy looked like this:
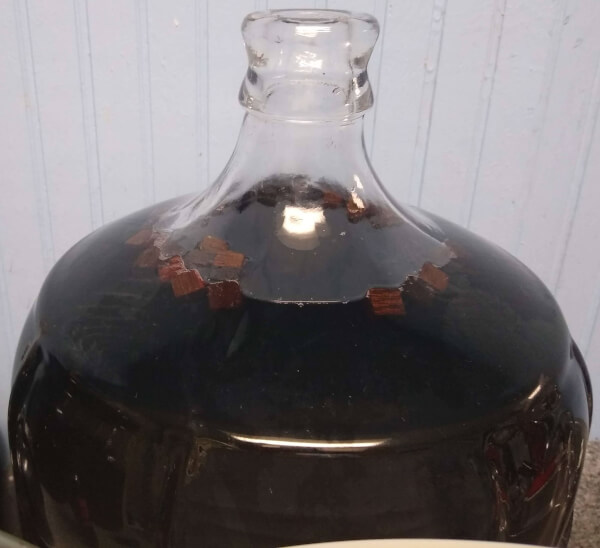
I added about 1/3 bottle of the Montepulciano, filling the carboy within an inch of the stopper. I could have filled it an inch less with no ill-effects, but since I had the bottle open, I topped to the max.
I’m too lazy today to mess with a bunch of smaller containers — it’s so much less hassle topping the kit to 23 liters.
01/17/2022
 Eric and I sample the wine last week, and I decided the further bulk aging wasn’t going to make a lot of difference. This wine is designed to be an early drinker, so getting it in the bottle after 5 months makes sense. Plus I have other things going and need the carboy!
I have today off work so I decided to bottle.
Overall, the color of this one is very nice; it’s rich looking. Given the dark color, it’s fruiter than expected, with a sour aftertaste on the back of the tongue. That may sound odd, but I really like this one!
While racking I saved a glass of the original wine for later comparison. After racking I added 6 oz glycerin, then compared the modified wine against the base wine. The glycerin improves the mouthfeel and softens the sour aftertaste, really mellowing the wine.
This one is drinkable NOW. It’s a nice sipper AND it will be good with hearty food. While it will be better in 6 months, I have no problem popping a bottle a month for quality control purposes!
After racking there was a couple of ounces of wine among the cubes in the carboy. I poured this off, for comparison, but goofed and had a couple ounces of modified wine in the bucket, so it was diluted. However, it proved once again that the wine around the cubes absorbs more oak character that is not disseminated in the wine. Because it was only 1 oz cubes the harshness was not as pronounced, but it was obvious.
However, after racking the carboy and stirring to integrate the glycerin, the oaky wine distributed as well — this is the modified wine, which came out great! I strongly recommend gently stirring the wine monthly during bulk aging, or at least when adding K-meta quarterly.
Should FWK offer Barbera again, I’m going to make one, and will buy the Forte kit which includes 2 skin packs and 1 seed pack. I can visualize this wine as a heavy-duty red, and it will be fantastic. Note that I don’t regret my choice to make this one as a quick drinker without skin packs. I exceeded my expectations and am pleased — I will cheerfully do this again.

Tasting Notes
It occurred to me that adding periodic tasting notes would be as useful as the winemaking notes, plus it will force me to make a real record. Look for notes on about a monthly basis until the batch is gone.
The notes will be mostly mine, but I expect that it won’t be hard to get guest tasters.
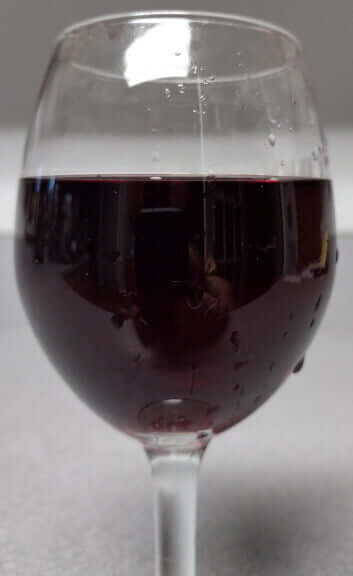
| 01/21/2022 | I poured 2 glasses, one plain and one using an aerating pouring spout. Both glasses have a nice, fruity aroma. I didn’t detect much difference.
Non-Aerated: initial taste is fruity with a sour finish on the back of the tongue. Oddly enough, it’s pleasant. Aerated: This wine doesn’t have a lot of tannin to soften, but the fruit is enhanced and the sour taste is softened. To serve this wine, I will use the aerator. No doubt, this wine is young and will improve with age, but it’s very drinkable now. The hard part will be not touching it, as it’s nice now. |
| 03/04/2022 | As with the first tasting, I poured 2 glasses, one un-aerated and one aerated. Unless otherwise noted, this will be my tasting SOP. As with the last tasting, both have a fruity aroma, and I don’t detect any significant difference between them.
Non-Aerated: Fruity up front, and the sour finish is diminished. Aerated: A bit more fruity up front, even less sour finish than the non-aerated. This wine has a stiffer, heavier spine than I expected. To explain — I expected a quick drinker, fruity and non-tannic, while having a decent body. While it is a quicker drinking wine, it’s got more depth than I expected. I suspect the follow-on tastings will be surprising. Given when I bottled it, it may have been in bottle shock the last time. This is not the same wine, 6 weeks later. |
| 03/24/2022 | Note: I do not look at previous notes before recording impressions, to keep this as honest as feasible.
Non-Aerated: Initial taste is fruity but not sweet. While some fruity wines give an impression of sugar, this one does not — it tastes like what I expect Barbera grapes taste like. There is still a pleasant hit of sourness in the aftertaste. Aerated: Not as fruity as the non-aerated, and there’s definitely some tannin there, but it taste like it’s the backbone of the wine, a stiffener, not an up-front flavoring. The sour aftertaste is not as strong as the non-aerated. |
| 08/14/2023 | Seventeen months have passed since the last recorded tasting, I’m down to 7 bottles of this wine.
Non-Aerated: The nose is muted as is the flavor. It’s got fruit, but honestly it’s disappointing for a 2 year old wine. Granted, it’s a concentrate-only wine with no skin packs, but I’m not impressed. Aerated: Once again, aeration proves its value! This really opens the wine up. The nose is a little stronger, but it’s still not all that strong. However, the aerated wine is fruitier, with a nice backbone of tannin keeping the fruit from being overpowering. It’s got a bit of a sour aftertaste, but at this point it’s more of an accent, and not a flaw. I’m not going to conserve my remaining bottles, but I will miss it when it’s gone. |
| 03/25/2024 | This is my last bottle, some of it going into pressure cooked beef.
Unaerated: The nose is light. Color is fine for a concentrate wine with no skin packs. Taste? Some fruit and an acid bite on the tip of the tongue after swallowing. In this state, the wine is boring for a nearly 3 yo wine. Aerated: Nose is a bit stronger, but not impressive. Note that this was made before my K&C test, and I demonstrated that K&C reduce nose. Taste? WOW! A lot more fruit, and no acid bite in the after taste. My tasting notes are a billboard for wine aerators. |
Wow! what an awesome write up. You do a great job giving pertinent info information. Thank you for taking your time to do this so well.
I’m happy this is useful to you!
Very helpful! I will be returning to your blog often. Thank you . Lukawines
I wish FWK still offered this kit.